Wednesday, December 24, 2008

MERRY CHRISTMAS


TOO ALL MY CUSTOMERS AND TEAM, WISHING YOU ALL AND YOUR FAMILIES THE MOST FABULOUS CHRISTMAS. MAY MANY OF YOU DREAMS COME TRUE
WELCOME TO ALL MY NEW TEAM MEMBERS AND CUSTOMERS. LOOKING FORWARD TO WORKING WITH YOU ALL IN THE NEW YEAR. MAY THE NEW YEAR BE EXTREMELY SAFE AND EXCITING FOR YOU ALL.
Have fun crafting!!! I will try to be back soon!!!

Quick Card Ideas


These quick designs are just a few of the I have been playing with for little message card/tags. All of the designs are using only Kaszazz products. A few of the cards would be great for Weddings or Celebrations. I have had to make lots of mini cards lately. It is interesting to start thinking outside your usual thought process. Sympathy cards, are not 1 you need to think about all that often. I have had to make a few lately and I really struggled. If anyone has any ideas for that type of card feel free to email me. These little cards are also great to add to presents/gifts.

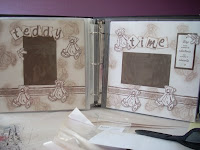
Teddy Time


I was not originally sold on the teddy bear stamps. I honestly thought I would not ever really use them. Boy, was I proven wrong! An extremely good customer, asked to do the Teddy Time double page spread. She, had purchased the stamps and was really looking forward to do it. So, with her stamps we set out to do the workshop. With stamping the first bear, I was completely sold. I love all the bears!!! They have become a favourite. So much so, I think I may have come up with my own 5pq (more of that when I have had time to work out the final details and have a chance to submit it!). Hope you like the layout as much as we do!!!

Mini Messages


This workshop is called Mini Messages. The colors used are Bahama and Purple Bazzill. These colors look really good together. Mini Messages are simple and quick. A really interesting workshop for beginners as, it covers a lot of basic techniques. This workshop gave me many ideas for other cards.

Enchanted Christmas Cards


This workshop is very easy and lots of fun. We all loved the colors. Why is the Bahama color one of my favourites? It is in alot of our workshops and I am loving mixing it with colours I would not have thought about before. In this 2 hour workshop, you use the Chateau Rose )paper from the Enchanted range of papers), Bahama bazzill and Crimson bazzill. I have done this workshop with several people and made a couple to send to customers and friends for Christmas.

Thursday, December 18, 2008

Too Long Between Posts

Ok, what happened to November? The last few months have been rather hectic. I added to the mayhem by deciding to write our car off. We only have 1 car. Luckily no one was hurt! Thank Goodness. I managed to do nearly $8000 worth of damage. Good news, was it ment we had to buy a new car. Bad news, Car shopping when you have no idea as to what you are doing and you only have 2 hours a day with your children in school. I like to make things difficult. LOL Good news, we now have a new car. A station wagon, so I can fit all my craft stuff in the back with little difficulty.

Life is now some what back to normal - if you can call the silly season "Normal". I have recently met some fantastic ladies who are new to our fantastic world of paper craft. They have helped me realise, that I have learnt an awful lot over the last year.

Now, I am going to go away and quickly take some photos of some workshops I have held over the last few months so you can all have a look at what I have been up to. I have not been slacking off - like some of you may be thinking. Will post these later tonight!! HOPEFULLY

Tuesday, October 7, 2008

October Card Swap


I have been part of a card swap group for most of the year. There is usually between 5 and 7 of us in the group. We must send details of what products are used to make the cards along with our names (so credit is given where credit is due!). It is an interesting bunch of people in the swap. The host (the one who gives us the details for the month), is actually a Stampin' Up Demonstrator (Hi Kari). The others include my very dear friend (who I cannot live without) - Hi Brig (needless to say she is also my best customer LOL), Alison, also a Stampin Up Demonstrator who lives in Melbourne, Melissa (who is part of my team) - Hi Mel, Kerryn (who is my upline, not sure if she reads this But Hi Kerryn and Felicity (who is a good customer) Hi Felicity. Some of us have not been making cards for very long, and others have been doing it for what seems like a life time. These are the two cards I have made for this month, SO, girls do not look if you want it to be a suprise!
The first was a sketch challenge. A Christmas card on a5, using any color other than traditional red, white and green. All product for this card is Kaszazz (except the ribbon). The stamped images are exclusive to Kaszazz - Lucy stamps once again. The second was a card anything other than A5, as long as it fits into a DL or C6 envelope and it must have a piece of patterned paper on it. I had some little tags, I purchased a while ago and thought I would use them. The patterned paper is from DCWV Once upon a time Range. The stamped image and strip of paper is Desert Haze from Kaszazz's Castaway A5 range. The stamped image is exclusive to Kaszazz from the Lucy range. It is the decorative square from the Ebony and Ivory set of Stamps.

Christmas Card Workshop


These two cards were made really quickly as part of a workshop that I will be holding at the request of a community centre, (on the 5th November). Seriously, the 5 cards we will be making in total were put together really quickly as examples for the centre. A bit twicking has been done to make these cards more to my liking. As, the centre, is not normally a place for craft classes to be done, it was asked that really simple techniques be used and quick to make cards be done. I hope it all comes together ok on the day. All the inks, card and stamps I will using for the Class are available through Kaszazz. The stamps are exclusive to Kaszazz (Lucy Stamps).

Bows


These are some bows I have made out of Kaszazz paper. They are extremely simple and do not take much time at all to put together. Double sided paper works best for this project. For more information please contact me. I have used some Enchanted Rouge Fleur (the red and blue paper), Gelati, Dotty Words (spotty and words) and Flourish Terracotta/Stipes. Other than a 6 x 12 piece of paper you will require some brads, magic mount and a silent setter. What a great way to dress up your presents. Owww, might have to go and make 1 in Christmas paper.....

Thursday, September 18, 2008

Cricut


This card is made for a card swap group that I am apart of. I had recently purchased the Paper Doll cartridge for the cricut and thought I may as well take this opportunity to use this cartridge. Love it. What a fun time I am going to have with this cartridge. The Cricut (I have the expressions model) is a die cut machine that uses different cartridges with images to cut out the shapes. (Hope that made sense) Anyway, you just choose your image press a few buttons and the cricut does the rest. I have used scrap paper for the doll and her accessories (hair, dress, shoes and crown). The frog was an after thought. I have used scrap paper for the frog and the blue background. I have mounted it onto black A5 card. I have water marked the background using perfect medium and the circle stamps from the Treasured Memories set of stamps available only through Kaszazz. The rhinestones were something I had lying around. To finish it of it is stamped with a stamp it, Happy Birthday script stamp (available through Kaszazz), inked in Crafters Black ink. A white gel pen was used to add the border

Cuttlebug


Okay, I know Kaszazz has nothing to do with either but I do own them and it was sometime before I joined Kaszazz that I purchased them. With the Craft Fair coming up, I thought this would be a great opportunity to get rid of some of my old papers (that aren't Kaszazz) and play with my cuttlebug and cricut again. For those of you who do not know what either are, the Cuttlebug is a diecut and embossing machine. It is hand operated by a handle. It is such a simple gadget use. I do not own any die cut bits, for it, as that is what I use my cricut for. To emboss you just need an embossing folder, paper placed in the centre of the folder and some mats designed for the machine. Then you just roll through. Embossing done. This card is made using the Paisley design folder. The cakes are cut with the cricut. I have once again used alumium foil for the embossing (found in most kitchens). I have learnt with practice, it is best to layer your foil with a little glue (stick) in the middle of the layers. Usually three layers is good. This helps to stop the aluminium foil ripping/tearing. Mounted the foil onto red crimson card, with glue stick. The red card is mounted on to white A5 card using super tape. White organdy ribbon is wrapped around the foil and stuck with a little bit of super tape. I have used Lucy stamps mini messages for the congratulations. This was stamped using crafters black ink.

Wednesday, September 17, 2008

More to Share Later....

I am going to leave you all for tonight. Hope I have left enough for you to look at and maybe get a few ideas. I do have alot more to share, but do not want to do it all in one night. I will be back soon. Have fun crafting!!!!!! Talk soon

Team Training Day


Hi, to everyone that went to the training day at Hillcrest held by Debbie Dawson. I do not know about you, but the new products are amazing and I was extremely excited when I found out I had qualified for the free pack of new products. The new products are definately a new direction, and style for Kaszazz. I believe they are heading in the right direction!! I am so glad I joined up when I did. It has allowed me to watch Kaszazz (formally known as Crafty Kids), grow and become what they have today. Well Done all at Kaszazz. I am hanging out to get my hands on some more of the wonderful products. Thanks Debbie for designing the new "all Boy" card 5 projects quick workshop. It is a great way to show of the wonderful new stamps designed towards the male population. Hope you all like these cards as much as I do.

A Quick Christmas Card


These two cards, were originally designed to use up some scrap paper. Instead they ended up making more scraps as I liked them and made multipules for a fair I will be doing in about three weeks with Paula. They are really easy and quick to make. The holly and the ornaments stamps are rollagraphs. What an wonderful concept rollagraphs are?!! Rollagraphs are amazing. For more information on rollagraphs send me a message. I am finding it easier and easier to find an excuse to purchase new rollagraphs. The green card, is made with the ornament stamp. The stamp is rolled over a Kaliedicolor fruit cake ink pad (we do not sell these unfortunately). The gold paper is some old paper I had lying around. The red card, is made with the holly rollagraph. It is rolled in the rollagraph black ink using a self inking handle. I have coloured in the holly with tombow pens (another favourite product).

I'm Back!!!


Hi everyone, I am back with lots to show and tell. I was hoping to be back this afternoon at the latest, but had a project/workshop to organise for a community centre (that I maybe doing in October). All the details were required by today. Ok, back to the sharing ideas. I have done quite a few Christmas cards lately. For those of you who know what I am talking about I have done the Enchanted workshop created by Naomi Elliot. I love the use of the Castaway paper and the white embossing powder. The snow white ribbons are just beautiful and they set the cards of in a lovely way. I hope you all like them as much as I do!! If anyone is interested in finding out more or would be interested in the workshop please let me know. I will be more than happy to show you.

Friday, September 12, 2008

SORRY........

Hi Everyone, sorry it has taken me so long to add something new to my blog. I feel like I am neglecting you all. Unfortunately you will have to wait just a little while longer. My life as been the busiest it has been for a while and I do not think it is going to let up anytime soon. Hopefully with by Wednesday 17th September, I will have posted some new things for you to look at. I am off to a consultant team training day tomorrow. I cannot wait!!! Lots of new products are to be released and a couple of new projects will be shown to us. As soon as I find out more and am able to have a few moments to share with you all - I will be back. Hope you are all having fun crafting, while I am unable:( Till early next week have fun crafting

Wednesday, August 13, 2008

WELCOME HEIDI

Hi Heidi. Heidi is a new member, of my team. Heidi, contacted Kaszazz, who referred her to me, early last week. I met with her on Tuesday afternoon and by Wednesday, late in the evening, her consultant application was approved. By Thursday, Heidi received her consultant starter kit. (Heidi, joined under the full price $250.00 option). Oh, it is great bonus to be living in little old Adelaide!!!!

My team is growing quickly. In just over a year, I have signed up 4 new consultants. All of which, were not customers. It has been a wonderful journey. I really do hope it continues. I am enjoying every minute of being a consultant. The journey has lead me to meet some wonderful, people who share the same passion. We have learnt new techniques, played with new products and shared ideas. Kaszazz is my way of staying sane. My way of tuning out to the rest of the world and its busy, hectic way. If anyone would like to know more please feel free to contact me. I am here to share my journey with you!!

SCRAPONIZER


I got my Scraponizer, last Thursday. I was so excited. I immediately unpacked it and filled it with most of my essentials. I had lots of trouble deciding which paper to decorate it in. Finally I decided on some paper from Kaszazz's Enchanted range. I used the Rouge Fleur paper. I originally had in my head that i would use the fleur side. However, I was in such a rush, to decorate, that the other side seemed more practical, as I would not have to spend too much time lining up the pattern (and possibly using up more paper than necessary). I did still want to use the fleur side, so I used it on the spine of the plastic storage containers. I used some white dots ribbon (from the Snow White ribbon pk), some small rhinestones and some punched out butterflies to decorate. I also used a rectangle note journal aid from the Enchanted range to note down all the things in my scraponizer.
I am most impressed with this item. It does fit more in it than I orginally thought it might. Thank you Kaszazz, for giving us, consultants, a fantastic product (once again), to be able to share with our customers. What a fantastic time to be part of the Kaszazz team!!!!

2 step Butterfly with Words


This card just happened. I was stamping out my 2 step butterfly with the idea I was going to emboss the overlay, then realised that was not going to happen the way I was imagining. Next thing I could see words behind the butterfly and thought I should stamp the script background over the butterfly. I used a post it note and traced around the stamped image, cut it out, and then put the cut out on the stamped image. I then inked up the script Background stamp and stamped it over the top of the butterfly image (with the post it note still over the top). Finally I removed the cut up post it note. I think it turned out rather well.


I have used a scrap piece of white card for the butterfly and word images. The ink I have used for the butterfly base is........ The butterfly outline is done in........... Finally, the script background stamp was inked in Distress Ink Walnut Stain. A piece of Parakeet Bazzill is used behind the white scrap piece and a piece of timber/cream mini gingham is wrapped around the white stamped paper. I have used a piece of mahogany A5 card available in the castaway card pk.

Love and Cherish Lace Cards


Once I finished stamping the bookmarks, i had a thought that the image would look great on black card with white ink. I wanted the middle image to look brighter, so, I decided to emboss it in white embossing powder. However, I forgot to use my static pillow and got speckly bits where i did not want them. That should teach me!! (LOL). Lets see, I used black a5 card, Frost White colorbox ink and white top boss embossing powder. From this, I had an image of a taller card, with the image in pink shades. So, I used white 8" x 8" card folded in half. I have then pulled out my Rose Petal colorbox inks, and used the Rouge and Warm Red.

Love and Cherish Lace stamp


I love this "lacy" looking stsmp. I have been hanging out to have a chance to stamp it in an array of colours. Saturday night gave me the opportunity to just have a play. Out came the distress inks and the stamp. I started off making some bookmarks. I was impressed with how simple and elegant the stamp looks in any colour. I have used Distress Ink in Black Soot (black), Faded Jeans (blue), Fired Brick (red), Shabby Shutters (green) and Tattered Rose (pale pink).

Wednesday, August 6, 2008

WORKSHOP


Ok, here are the other two cards that are part of the "Fancy Fold Trio Workshop". The date for this 2 hour workshop........23rd August 7:30pm the cost will be $25 per person. I am sorry I did not get a chance to post it until now. Life has been a little crazy. I am doing a fundraiser for Mawson Lakes Preschool on Friday night and I have not even had a chance to look at what we might do as a make and take. Good thing I have a lot of supplies on hand, just for that kind of situation. Now, back to the workshop. If you would like more details please leave a comment and I will get back to you asap or alternatively send me an email (alicia.jamieson@gmail.com). Have fun crafting....until next time.....

Saturday, August 2, 2008

Shoe


I thought it might be time to do another workshop. So, with a little bit of time on my hands, I searched through the long list of ideas and decided it might be time to do something a little different. So, here it is - a shoe. This "shoe" is part of the fancy fold card trio workshop that I will be holding in a few weeks. For more information and the other 2 card designs stay tuned. I should be able to confirm details before Tuesday. (Just have to re-juggle a few dates on my calender).

Sunday, July 27, 2008

Invitation Ideas


Here are two invitations I designed very quickly. The DL (long thin) size card, is my least favourite. The other is a joy fold card. I love this. I think you could put lots of different things on the front panel. In this case, maybe, who it was that was inviting you to their wedding (for example Alicia and Scott would like to invite you to......). On the inside you could put the details (where, time, date, etc). The design would be easy to adapt to run in either direction and to make it larger would not be difficult. I have more ideas playing around in my head. So, with a little more time, maybe you will get to see more.

Aluminium Wedding Card


At the Clipsal Christmas in July party I attended with Hubby on Friday night, I met up with a wife of one of hubby's work colleges who has telling me about her ideas for her up coming wedding. From her ideas and suggestions I had a hundred ideas playing around in my head. With the short amount of time I had spare over this busy weekend, I have managed to through a couple of them together. The congratulations card, is one I had made before. I love running aluminium through the cuttlebug. All products for this card are available through Kaszazz (except the aluminium and the cuttlebug embossing folder)

Friday, July 25, 2008

Still Playing


Hi All, I had a brief moment last night were I got to have a play once again. I was thinking of my perfect pearls with some glossy paper and Kaszazz's Lucy Stamps Treasured Memories. Once again the photo is not doing justice to the shininess of the perfect pearls. I think it turned out rather well. I have seen lots of designs using these particular stamps (from this set), used in very similar ways. Hope I have not ripped any ones idea!! Have Fun Crafting - Till Next Time!

Wednesday, July 23, 2008

Perfect Pearl


Kids are already in bed (about 7:20pm). The house is quiet and hubby has knicked off to Bunnings. I am on my own fiddling with some Perfect Pearls that I have not played with for a long time. While I was playing, i found myself pulling out my cuttlebug and some embossing folders. Before I knew it, I had my perfect medium pen colouring in the embossing (made by the cuttlebug) and I was then dusting over my perfect pearls. I am impressed. I think it turned out quite well, for a freakish Wednesday evening. So I am sharing a lot quicker than I had expected. Sorry about the photo. I do not think it does justice to the card or the perfect pearls used. Have a great evening and who knows with any luck I will be back tomorrow...... (LOL!!!)

Scrapbooking


Sorry it has been so long since I have posted. School holidays have thrown the little system I had,out of wack. However, I am now back! I have a few things to share with you which I will do over the coming days/week. We have just had a few, extra curriculum activities thrown into our daily lives, which I am hoping to be able to work around so I can still blog at least once a week (at least - this is the new plan).

These are a few pages I have been working on, in my spare moments over the two weeks that children had home from school. I was hoping I would be further along with them, but nevertheless, here they are. All the paper shown, is from a Spice Cut n Crop, exclusive to Kaszazz. Sonia Gibson, has designed the particular Cut n Crop layouts that are supplied in the pack. I have adapted her designs slightly, to work with the photos I had in mind. I am pleased with how they are coming along. Each of the pages you see here, have a co ordinating pages that matches (making them a double spread). If I get time I will post these pages soon. Have fun crafting - Talk soon.

Tuesday, July 8, 2008

Just a Little Note


My sister Bec, needed a card this week, for a customer. (Bec is a tupperware demonstrator). The customer has just had surgery and Bec just wanted her to know she was thinking about her. So, I decided it was time to use up some of my scrap pieces of paper. I found some purple bazzill and some lighter purple bazzill that was just the right size and some organdy ribbon. I purchased the butterfly punch last week (through Kaszazz) and I was thinking of every excuse to use it. So, here it is used on this card. I think it turned out rather nice. Such a simple design, that worked. Hope you like it too?!!

Birthday's


The past few weeks have been full of birthdays. So, needless to say I have been busy making cards for those who have had a birthday. 4 Birthday's to be exact. One card I made twice, so design time was cut down just a little. 3 out of the 4 were made with all Kaszazz products. The fourth was made with some products I had lying around the house - I believe Felicity gave them to me to finish off a basketball page. Thanks Felicity. It was nice to be able to make cards for people I know, instead of just for the fun of it. Thinking about what that person likes made it alot easier to design the cards.

Tuesday, July 1, 2008

Bon Voyage


Here is another card I made for a card swap a few months ago. I really like it. I have used a piece of map/chocolate paper from the rustic range. Three stamps have been used. Two are from Stamp it (which Kaszazz sells). These are the small luggage stamp (called Travels) and the bon voyage stamp (called Bon Voyage). The third stamp is an unmounted stamp from the Lucy's stamp range. It is the small Postcard stamp. I have used tombow pens to colour in the suitcases and hat. I have learnt to water down and blend the colours, using a plastic surface (ice cream, butter, etc or an acrylic block). Rub the tombow over the surface and then, run the blender in the ink, colour in the stamped image. It is a little more time consuming but adds a great finish to an inked image. Have fun creating!!!

Monday, June 30, 2008

Better Late than Never!!!


I know I have no excuse!!! So, here are just a few of the things I have made in the last week or so.
The first is a clock. I have not added any photos, like our catalogue suggests (mainly because i think this design does not need 1). The paper used her is the Chateau Rose (from the Enchanted Range).
The second is a little note card. Don't you think it is rather cute? It is a new demo item released for demonstrators to show their customers. I think if i do it again, I might choose another colour. My last lot of customers suggested I make it in pinks and reds rather than blue. (I know blue was choosen because of the new enchanted paper). I have inked around the edges in ancient page lapis blue and used the a piece of Alpine Dream paper (from the Enchanted range) to wrap around the card.

Friday, June 27, 2008

Not Much too Show

Sorry guys, I have been a little slack this week!! To be honest I have been going to sleep earlier because of the weather. I have also started a diet and this has made me more lethargic than usual. I will try and add a few more pic (with descriptions by the end of today). I have attempted two new projects - a clock and a flourish family tag book (the tag book is a workshop I am doing tonight and again on Sunday) Have fun till I get a chance to come back!!

Tuesday, June 17, 2008

Creative Monday


I got creative yesterday, with the little time I had between the running around I had to do. Kaszazz have just released some new workshops for consultants to do with their customers. Love them!!!! Especially the new box in boxes workshop. I was in a hurry to give this workshop a go. So with the little time available to me, I some how managed to get one made. I also made a castaway tag and pocket book, (which is another workshop). Yes, i was up late and have had little sleep. After achieving the completion of these two projects, I believe it may be time for me to set myself some new goals. Not really sure how this will work with our busy family life- things change every minute around here. I think it is time for me to try one new project a week! (Ok, lets be realistic this is probably going to turn into a fortnight). How does everyone else out there, mangage to find the time to do all the little things they would like to do???? Time runs out so fast - I never have enough hours. Ok, enough ..... Back to yesterdays projects. The tag and pocket book is done in some of the castaway range of papers (only available through Kaszazz) and the box of boxes is done in the last of my Gelati range of papers (you guessed it only available through Kaszazz). It will be time for me to find another range of papers to fall in love with. I have put in an order today. Lets see if when it comes I get some new inspiration.

Sunday, June 15, 2008

Busy Friday Night


Friday night stated out with me not achieving much at all. By 2am Satuday morning I had put together a Flourish cut and crop (exclusive to Kaszazz). The last two pages (which i will not post just yet) have been changed from the original instructions that come with the kit. I was not sure I was going to like the pages when i started. Once I really got into it and started adding my own flare to things, I loved how the pages started to look. As yet, i have not added the photos or embellishments. However, I know once I located the photos that I think will look great on the pages, I know it will not take long to finish. The cut and crops are a great way to get introduced to scrapbooking. They are also great for the more advanced scrappers, as they give you a different way to use the papers, that you may not have thought about yourself

Decorated Tin Case


My tin case is done! It was quite easy and did not take as much time as I thought it would. Love the outcome. The paper looks fantastic. I have used the small dragonfly stamp (an exclusive stamp to Kaszazz, made by Lucy stamps) to stamp around the sides of the tin. I used the Pink Pastel Chalk ink for this image. The paper is from the Gelati Range of papers through Kaszazz - it is called "Stripy Journal". The strips on the top of the tin is the reverse side of the "Stripy Journal" paper. I Love these strips! The Cherish circle stamp and the Love heart stamp are from the new release of products (that came out in May). They are in a set called Love and Cherish (a set of 8 stamps). The ribbons used are also available separately though Kaszazz or you can purchase them in a pack (6 different designs - 2 metres of each).

Tin Case


This tin case is available through Kaszazz. To be very honest, I have had my tin for quite some time. I have been very undecided about what (gorgeous) paper I wanted to use to decorate it. It is a tin I use to put my basic Kaszazz products in. I want to be able to find it easily on my tables of supplies. So, after making my waterfall concertina mini album, I thought my Gelati range of papers would look great on my tin. With a little time free during the week, I decided it was time to cut up the papers and just do it.